How to install Wagenswest type one bus IRS kit
Our IRS kit is really simple.
Except for custom trailing arm shackles and spring plates this kit uses all stock type one IRS rear-end parts.
If you don't feel like buying our parts feel free to use this info to do it your self.
To start you will need the Wagenswest IRS kit. You will also need to round up a set of type one trailing arms,1 inch longer axles, and a 1969-79 bug transmission, you will also need all of the fasteners/nuts and bolts used on the bug.
NOTE (you can run stock bug axle shafts, if you'r axle are completely horizontal and not at an angle, about a 3.5 inch drop).
Some things to consider
#1 removing the gas tank.
#2 you will need to relocate the heater cables to make room for CV joints.
#3 you will need to relocate your brake lines to make room for the trailing arm shackles.
I am sure you will find a couple more.
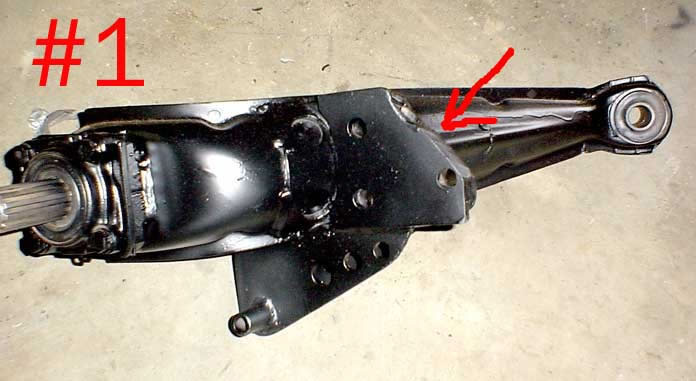
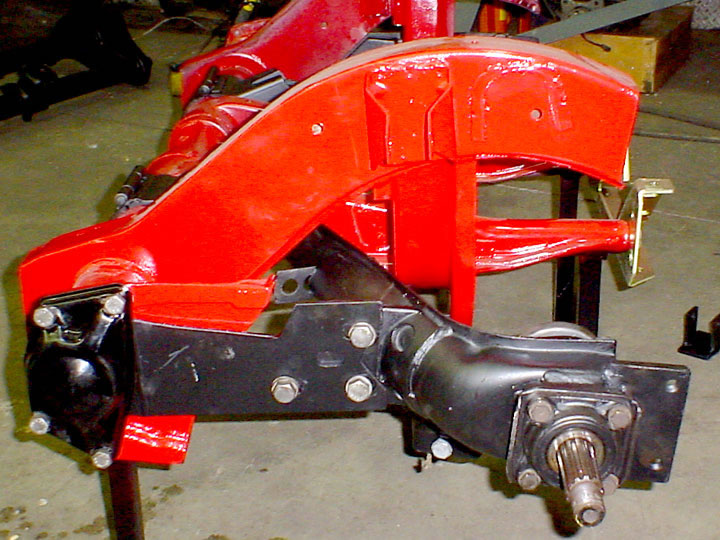
Image #1 You will need to trim your trailing arms where they mount to the spring plates, at about a 45 degree angle as seen in the picture. The reason you will need to trim this part is to keep it from hitting the torsion housing because the trailing arms will now be bolted to the inside of the spring plates.
So the trailing-arms now bolt on the inside of the spring plates and this is because the bus spring-plates sit farther apart than the bug, and we want to use stock axles as well as be able to run aluminum wheels IE BRM's ECT.
The spacer plate that we provide goes in between the spring plate and trailing arm.
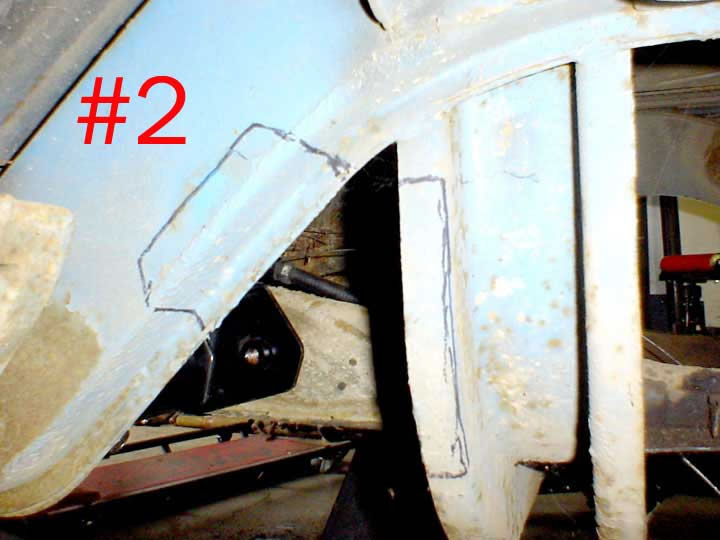
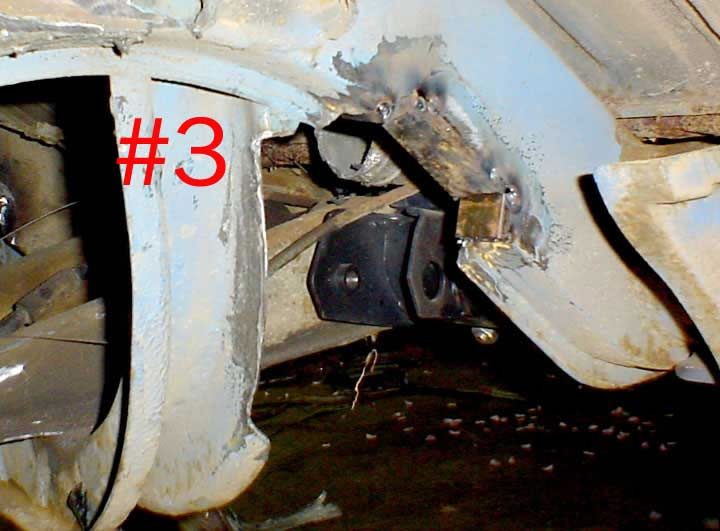
Image #2 You will need to trim some of the under carriage as seen marked in the picture (if you don't plan on totally dumping the bus you won't need to fully notch the top frame, you can get away with just trimming the lip). You will need to do this on both side's but Before you notch out the passenger side you will want to pull back the wiring harness so you don't sever it (not fun) If you do end up fully notching the frame rail you may want to box the in the now open frame in as seen in image #3.
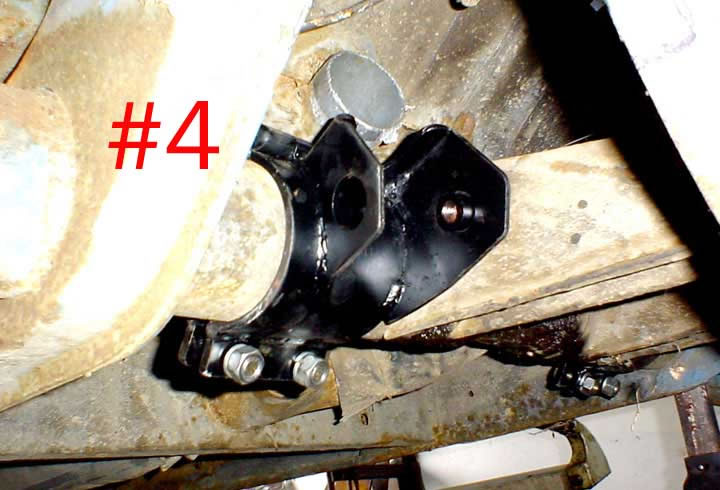
Image #4 when installing the trailing arm shackles you will want to push them as close to the frame horns as possible and set them at a slight upward angle, later you will most-likely want to adjust your camber by increasing or decreasing this angle.
Now you should be ready to bolt on your trailing arms and spring plates, I have found that the best way to set the height rite is to eyeball the spring plates and mount everything loosely. Then set the bus on the ground and roll it back and forth with your fat buddy in the back to simulate the weight of the motor, if you like how it sits bolt it up, if not adjust it again.